
Introduction
When it comes to using hand tools, one of the most important factors is ensuring that the tools are in good condition. Whether you’re a professional tradesperson or someone who simply enjoys DIY projects, it’s essential to inspect your tools regularly. The last thing you want is to find yourself in the middle of a job only to discover that your tool isn’t performing as expected. Regular inspections not only help prevent accidents but also ensure that your tools remain efficient and durable. This guide will walk you through the essential aspects of inspecting hand tools, providing you with the knowledge you need to maintain your tools in optimal working condition.
Why Tool Inspections Matter
The Importance of Tool Maintenance
Every hand tool, from hammers to wrenches, is designed to perform specific tasks. However, with constant use, they can wear down over time. Without regular maintenance and inspection, tools can lose their effectiveness, causing delays and frustration during work. This is especially true when tools are subjected to extreme conditions, such as in construction or automotive work. By routinely checking your tools, you ensure that they work as expected when needed most.
Safety Concerns: Preventing Accidents
One of the primary reasons for inspecting hand tools is safety. Tools that are worn out, broken, or rusted can become a hazard. For instance, a loose handle can result in a tool slipping from your hand, while a cracked blade might break off during use. Regular inspections can catch these issues early, preventing accidents that could harm you or others around you. Properly functioning tools are not only safer, but they also reduce the chances of injury due to malfunctions.
How Regular Inspections Save Time and Money
A tool that’s in good condition works more efficiently, saving you time and effort. Moreover, a tool that’s regularly maintained will last longer, making it a more cost-effective investment in the long term. Preventive maintenance also prevents you from having to replace tools too soon, which can be expensive. Taking a few minutes to inspect and maintain your tools can significantly extend their lifespan and improve your productivity.
Minimizing Wear and Tear
Hand tools are designed to withstand a fair amount of wear, but over time, they will start to show signs of fatigue. Regular inspections help identify wear patterns and help you catch problems before they become more severe. For example, worn-out handles or chipped blades can significantly impact a tool’s performance. By staying on top of these issues, you can address them early, preventing the need for costly repairs or replacements later on.
Signs Your Tools Need Attention
Visible Damage: Cracks, Chips, and Dents
The first step in inspecting a hand tool is checking for any visible signs of damage. Cracks, chips, or dents on a tool can compromise its strength and functionality. Whether it’s a wrench with a cracked jaw or a hammer with a chipped head, these imperfections are clear signs that the tool may no longer perform as expected. If you notice any such damage, it’s essential to replace the tool or repair it immediately to avoid further problems.
Rust or Corrosion: Why It’s Dangerous
Rust is another common issue with hand tools, especially when they’re stored in humid conditions. Rust can weaken the material of a tool, causing it to break or become ineffective. It can also make the tool more difficult to handle due to its rough, gritty surface. If you find any rust or corrosion on your tools, it’s crucial to clean them promptly and take steps to prevent future rusting.
Excessive Wear: When Does It Affect Function?
Over time, the repeated use of tools can lead to excessive wear. Handles may become smooth and slippery, edges may dull, and moving parts might loosen. While a bit of wear is expected, too much can affect a tool’s performance. For instance, a dull saw blade or a worn-out screwdriver tip will make tasks more difficult and less efficient. Inspecting tools regularly helps identify when wear has reached a point where it impacts functionality.
Loose Parts or Screws: Risk of Malfunctions
If a tool has any loose parts, screws, or nuts, it’s essential to address the issue right away. Loose components can cause the tool to malfunction, leading to unsafe conditions or ineffective work. This is particularly critical for tools that involve moving parts, like pliers, hammers, or wrenches. Tightening any loose parts or screws will prevent further damage and ensure that the tool operates smoothly.
Step 1: Inspecting Handles
Checking for Cracks and Splits
The handle of a hand tool is its most essential component, as it ensures a firm grip and helps with control during use. Inspecting the handle for cracks or splits is crucial for safety. Even a tiny crack can expand under pressure and cause the handle to break, potentially leading to an injury. If you notice any visible damage, it’s best to replace the handle or repair it immediately to ensure safe use of the tool.
Ensuring Proper Grip and Comfort
A tool’s handle should be comfortable to hold and provide a secure grip. Check for any signs of wear on the handle surface, such as slickness, cracks, or rough spots that might cause discomfort. A handle that doesn’t feel right could lead to hand fatigue or accidents, especially during extended use. Ensure that the handle is ergonomically designed for the task at hand, and replace it if it no longer offers proper comfort or grip.
Materials: Wood, Metal, and Plastic Handles—What’s the Difference?
Different materials offer different benefits. Wooden handles are traditional, providing a natural feel but may wear over time. Metal handles are durable but can become slippery without proper coating, while plastic handles are lightweight and resistant to corrosion but can crack under extreme pressure. When inspecting handles, consider the material and assess whether it’s still suitable for the tool’s intended use.
How to Fix or Replace a Damaged Handle
If a handle is cracked or splintered, it’s best to replace it rather than attempt a temporary fix. Replacement handles are readily available for many tools, and they’re relatively easy to install. For minor surface damage, sanding or applying grip-enhancing products can help prolong the life of the handle. However, if the damage affects the tool’s integrity, replacement is the safest option.
Step 2: Assessing Tool Blades and Edges
Sharpness Check: How to Evaluate the Blade’s Sharpness
For cutting tools, such as knives, saws, or chisels, sharpness is critical. To check the sharpness of a blade, try gently cutting through a piece of scrap material. If the blade struggles or the cut is jagged, it may need sharpening. A sharp edge not only makes the job easier but also reduces the effort needed to make clean cuts.
Chipping or Bending of Edges: What to Do
Chipped or bent edges are common signs of tool abuse. Even small chips can compromise a blade’s ability to perform effectively, and a bent blade will never cut as accurately as a straight one. For minor issues, honing or grinding the blade can restore its function. However, significant damage usually requires replacing the blade altogether.
How to Properly Sharpen Tools
Sharpening tools is essential for maintaining cutting efficiency. To sharpen tools like chisels or knives, use a sharpening stone or file, applying even pressure along the entire edge. If you’re using an electric sharpener, be careful not to overheat the metal. Always follow the manufacturer’s recommendations for sharpening to avoid damaging the tool.
Handling Dull Blades and Preventing Damage
If you notice a blade becoming dull, it’s time to address the issue before it gets worse. A dull blade can lead to poor performance and increase the risk of accidents as more force is needed to perform the task. By maintaining sharp edges and properly storing tools, you can extend their sharpness and prevent premature dulling.
Step 3: Inspecting Joints and Moving Parts
Loose or Worn Pivot Points
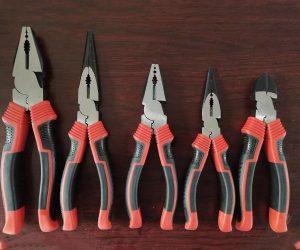
Many hand tools, such as pliers and scissors, have moving parts that rely on tight joints. Loose pivot points can cause the tool to become ineffective or dangerous, as the parts may slip out of alignment or fail to move as intended. Regularly check these joints and tighten any loose screws or bolts. If the pivot is worn, consider replacing the tool or the joint assembly.
How to Fix or Tighten a Loose Joint
Loose joints are common, especially with older tools. To tighten a loose joint, first, check for any rust or corrosion that might prevent smooth movement. If the joint is clean, use a wrench or screwdriver to tighten the fastener. For tools with adjustable pivot points, ensure that they are set to the right tension to maintain proper function.
Lubrication Needs: Ensuring Smooth Operation
Moving parts, such as those in pliers, wrenches, and scissors, often need lubrication to prevent friction. If the tool seems stiff or difficult to operate, applying a small amount of lubricant can improve performance. Use a suitable lubricant, like machine oil or silicone spray, to keep the moving parts working smoothly. Be sure to clean any excess lubricant after applying it to avoid attracting dirt and debris.
Examining Hinges, Springs, and Other Moving Parts
For tools with more complex moving mechanisms, such as folding knives or pruners, regularly inspect the hinges and springs. Worn springs may fail to return to their original position, making the tool unusable. Check these parts for any signs of wear or damage. If needed, replace worn springs or hinges to ensure the tool remains functional.
Step 4: Checking for Rust and Corrosion
Identifying Rust and Corrosion Early
Rust and corrosion are the enemies of metal tools. They can weaken the tool’s structure, cause it to break, and make it harder to use. Look for any signs of rust, particularly around joints or where two parts rub against each other. If you spot rust, take action immediately to clean and prevent it from spreading.
How Rust Affects Performance
Rust can cause a tool to lose its smooth finish and make it less efficient at performing its task. For example, a rusty blade may drag through material, reducing cutting efficiency. Rust can also weaken the material over time, causing it to crack or break under stress.
Cleaning Techniques: Getting Rid of Rust
To remove rust, start by using a wire brush or sandpaper to scrub off the surface rust. For stubborn rust, you can soak the tool in a rust remover solution or use a mixture of vinegar and baking soda. After removing the rust, apply a protective coating to prevent it from coming back. Regular cleaning and maintenance can keep rust at bay.
Preventive Measures: Keeping Rust at Bay
The best way to fight rust is to prevent it from forming in the first place. Store your tools in a dry place, and use a protective coating, such as oil or wax, to keep moisture away. Regular cleaning after use and occasional maintenance will also help protect against corrosion.
Step 5: Handling and Grip Inspections
Why Ergonomics Matter for Comfort
Ergonomics play a significant role in ensuring that a tool is comfortable to use. A tool that doesn’t fit your hand properly can cause strain, especially during prolonged use. Look for tools with ergonomic handles designed to reduce fatigue and enhance comfort. This will not only improve your performance but also reduce the risk of injury.
Assessing Handle Coatings and Non-Slip Features
Check if the handles have any non-slip coatings, such as rubber or textured surfaces, to ensure a better grip. If these features are worn down, they should be replaced or repaired. A good grip will help prevent accidents by giving you more control over the tool during use. If the coating is damaged, consider wrapping the handle with a new grip material or replacing the handle altogether.
Replacing or Repairing Grips for Safety
If the tool’s handle becomes slick or damaged, it’s essential to replace it immediately. A damaged grip can cause the tool to slip out of your hands during use, leading to potential accidents. Replacement grips are widely available for most tools, and the process of swapping them out is generally simple. Make sure the new grip is properly fitted and comfortable.
Step 6: Testing for Proper Alignment
Misaligned Parts and Its Effect on Usage
Misaligned parts can seriously affect the performance of your tools. If the parts of the tool are not properly aligned, it may not work efficiently or could be dangerous to use. Regularly check the alignment of your tools, especially with multi-part items like pliers and wrenches. A slight misalignment can prevent the tool from working as intended, which is why it’s critical to spot these issues early.
How to Align Parts Correctly
To fix misalignment, first loosen any relevant screws or bolts. Adjust the parts into their correct positions and tighten the screws. Make sure that all parts are securely aligned and that the tool operates smoothly before use.
When to Replace Misaligned Tools
In some cases, misalignment can be so severe that the tool is no longer functional. If a tool’s alignment can’t be fixed with minor adjustments, it’s time to replace it. Continuing to use a misaligned tool can lead to more damage and safety hazards, so it’s better to replace it sooner rather than later.
Step 7: Evaluating the Tool’s Weight and Balance
Why Weight Distribution Affects Tool Performance
The weight of a tool plays a critical role in its performance. Tools that are too heavy can cause fatigue, while those that are too light may not provide enough power for the task. Properly balanced tools allow you to maintain control and precision. If a tool feels off-balance, it can lead to inaccuracies and increase the risk of injury.
Assessing Balance and Handling
When inspecting a tool, check how it feels when you hold it. A well-balanced tool should feel comfortable and easy to control. If the weight distribution feels awkward or heavy in one area, it might be time to consider either replacing the tool or adjusting its components for better balance.
Signs Your Tool’s Weight or Balance is Off
If you feel extra strain in your hands, wrists, or arms when using a tool, its weight distribution might be wrong. Excessive weight or a poor design can cause discomfort and reduce performance. If you notice these issues, consider replacing the tool or adjusting its components to improve balance.
Correcting Imbalance Issues
In many cases, correcting balance issues may involve adding counterweights or adjusting the tool’s design. If these adjustments are not possible, replacing the tool with one that better suits your needs is the best solution. Always ensure that you have a tool that feels comfortable to use and doesn’t strain your body.
Step 8: Assessing Tool Functionality
Test Runs: Ensuring Smooth Operation
When inspecting a hand tool, it’s crucial to perform a test run to verify that it functions as expected. A test run will allow you to detect any irregularities or malfunctions that may not be visible during a visual inspection. For example, with pliers, test whether they open and close smoothly, or with a hammer, check the impact and handle stability. By actually using the tool in the way it’s meant to be used, you can ensure that it operates without any issues.
Common Tool Malfunctions to Look Out For
Common malfunctions include things like slipping parts, unresponsive mechanisms, or uneven cuts. For example, a wrench that doesn’t grip tightly could cause problems during use, or a saw with a dull, worn-out blade might not cut cleanly. Be sure to check that all moving parts function as they should and that the tool is producing the intended result. If you find any signs of malfunction, address them immediately—this might involve replacing parts, lubricating joints, or sharpening edges.
How to Troubleshoot Hand Tools
If you notice your tool isn’t performing as it should, troubleshooting may be necessary. Start by checking for any obvious signs of wear, damage, or loose parts. If none are apparent, check whether lubrication is needed or if there’s rust preventing smooth operation. Sometimes, simply cleaning the tool or tightening screws can restore its functionality. If the problem persists, it might be time to consider repairing or replacing the tool.
When to Seek Professional Help
If your inspection reveals a problem that you can’t fix yourself, it might be time to call in an expert. For more complex repairs, such as those involving internal mechanisms or advanced parts, a professional repair service might be necessary. This is particularly true for high-end tools or those with intricate components that could be easily damaged if not handled properly. Don’t hesitate to seek professional help if you’re unsure how to fix the issue yourself.
Step 9: Cleaning and Maintaining Your Tools
Routine Cleaning for Longevity
One of the best ways to keep your tools in top condition is by cleaning them after every use. Tools that accumulate dirt, oil, and other debris can become sluggish and difficult to operate, or worse, suffer from rust and corrosion over time. Cleaning your tools after every use will help prevent this and extend their life. A simple wipe-down with a clean cloth and some mild soap can do wonders for keeping your tools looking and functioning like new.
Choosing the Right Cleaning Products
Not all cleaning products are suitable for all types of tools. For example, avoid using harsh chemicals that can strip the finish or degrade the material of the tool. Instead, opt for mild detergents and lubricants specifically designed for cleaning tools. For rust removal, you might need a more specialized rust remover, but for everyday cleaning, a simple soapy water solution will suffice.
Why Cleaning Tools After Every Use Is Crucial
Cleaning your tools after every use is crucial for several reasons. First, it helps prevent the buildup of harmful substances that can cause damage to the material of the tool. Second, it ensures that the tool is ready for the next job without delays. Finally, regular cleaning helps identify any small issues, like cracks or loose parts, before they become larger, more expensive problems.
Maintenance Schedules: How Often Should Tools Be Cleaned?
While cleaning tools after every use is ideal, it’s also essential to follow a regular maintenance schedule. How often you clean and maintain your tools depends on the type of work you do and the frequency of use. If you’re using the tools daily or in demanding conditions, a more frequent cleaning and maintenance schedule is necessary. For light, occasional use, a monthly or quarterly cleaning might be sufficient.
Step 10: Storing Tools Correctly
Why Proper Storage is Essential for Tool Health
Proper storage is just as important as maintenance when it comes to preserving your tools. Improper storage can lead to rust, bending, and overall deterioration of tools, especially when exposed to extreme temperatures or moisture. Ensure that your tools are kept in a dry, cool area and away from direct sunlight or humidity, which can lead to rust. Proper storage not only preserves the tools but also ensures they are easily accessible when needed.
Best Storage Practices: Hooks, Boxes, and More
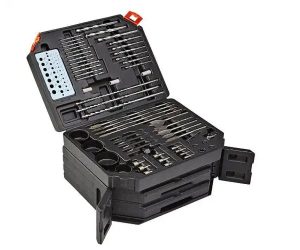
There are several effective ways to store your tools, depending on the type and frequency of use. Hanging tools on hooks or pegs allows for easy access while keeping them organized. For more delicate or expensive tools, a storage box with foam inserts or padded dividers can protect them from damage. Additionally, for tools like saws, hammers, and wrenches, you might consider a tool chest to keep everything neatly organized and protected.
Avoiding Damage During Storage: Temperature, Humidity, and Contact
When storing your tools, be mindful of environmental conditions. Extremes in temperature and high humidity can accelerate the rusting process, particularly for metal tools. Make sure to store tools in a way that prevents them from touching each other, as constant friction can cause wear and scratches. Investing in a well-organized storage system, such as a locked toolbox or wall-mounted pegboard, can reduce the likelihood of accidental damage.
Step 11: How to Properly Replace and Repair Hand Tools
When to Replace Parts vs. Repairing
When a hand tool shows signs of wear, the question often arises: Should you replace the damaged part or try to repair it? The decision depends on the extent of the damage and the cost-effectiveness of repairing versus replacing. Minor issues like a loose screw or worn-out handle can typically be fixed at home. However, severe damage, like broken blades or cracked heads, might require replacing the part entirely.
Choosing the Right Replacement Parts
Choosing the right replacement parts is crucial for restoring a tool’s functionality. Ensure that the replacement part matches the original tool’s specifications for proper fit and function. Many tools come with parts that are readily available from the manufacturer or authorized dealers. If replacement parts are difficult to find, consider getting a similar tool or asking a professional to make custom replacements.
Cost-Effectiveness: Is It Worth Repairing or Replacing?
In some cases, repairing a tool might not be worth the time or money, especially if the cost of replacement parts exceeds the cost of buying a new tool. For example, if a tool is old or heavily worn, replacing it might be the more economical option in the long run. However, for more expensive or specialized tools, repairing or replacing individual parts can extend their life at a fraction of the cost of purchasing a new one.
DIY Repair Tips and When to Call a Professional
For some minor repairs, you may be able to fix the tool yourself. For example, tightening loose screws, replacing worn-out grips, or sharpening a dull blade can all be done without much difficulty. However, for more complex repairs, such as fixing a malfunctioning mechanism or replacing major parts, it’s best to call a professional. A professional repair service can ensure that the tool is properly restored and safe to use.
Step 12: Cleaning and Maintaining Your Tools
Routine Cleaning for Longevity
As mentioned earlier, keeping your tools clean is essential for their longevity. Dirt, dust, and grime can cause tools to degrade faster, reducing their effectiveness and performance. Regular cleaning prevents these substances from accumulating and ensures that your tools remain in optimal working condition. Consider using a cleaning brush or cloth to remove debris after every use.
Choosing the Right Cleaning Products
Selecting the correct cleaning product is just as important as cleaning the tool itself. Harsh chemicals can strip paint or coatings from tools, causing them to rust or corrode more quickly. Opt for cleaning products designed specifically for hand tools, such as lubricating oils, degreasers, and rust removers, to maintain tool integrity.
Why Cleaning Tools After Every Use Is Crucial
Cleaning tools after every use is one of the easiest ways to extend their lifespan. Cleaning removes the dirt, dust, and other materials that can damage or wear down the tool over time. It also helps identify any minor issues early, such as a loose screw or broken component, preventing bigger problems down the line.
Maintenance Schedules: How Often Should Tools Be Cleaned?
While cleaning after every use is ideal, establishing a routine maintenance schedule can help ensure your tools stay in top condition. For most tools, a deep cleaning every few months is sufficient, but for high-use tools, consider cleaning and maintaining them more frequently.
Step 13: Storing Tools Correctly
Why Proper Storage is Essential for Tool Health
Proper storage is essential for keeping your tools in good working condition. Storing tools in a dry, organized manner helps prevent damage from moisture, rust, or accidental impacts. It also makes it easier to find and access your tools when you need them. Investing in a well-organized storage system can prolong the life of your tools and reduce the chances of misplacing or damaging them.
Best Storage Practices: Hooks, Boxes, and More
To maximize storage space and prevent damage, use a variety of tools and storage options. Hang tools on hooks for easy access and visibility, or use toolboxes to protect them from the elements. For more fragile tools, such as precision instruments or knives, consider investing in padded tool storage or foam inserts for extra protection.
Avoiding Damage During Storage: Temperature, Humidity, and Contact
Environmental factors like temperature and humidity can affect the durability of your tools. Store tools in a dry, cool place, and avoid areas with extreme temperature fluctuations. Make sure tools aren’t stored in ways that might cause friction or scratching, and avoid stacking heavy tools on top of delicate ones.
Step 14: How to Properly Replace and Repair Hand Tools
When to Replace Parts vs. Repairing
The decision to repair or replace a tool depends on its condition and the cost of repair. For minor issues, like a loose screw or dull blade, it may be more cost-effective to repair the tool. However, if the tool is severely damaged, it’s often better to replace it entirely to ensure optimal performance and safety.
Choosing the Right Replacement Parts
When replacing parts, make sure to choose the correct replacement that matches the tool’s specifications. The replacement part should fit properly and function as intended to avoid damaging the tool further. Many manufacturers offer replacement parts for their products, which is often the best option.
Cost-Effectiveness: Is It Worth Repairing or Replacing?
In some cases, repairing a tool is more economical than replacing it. Consider the cost of the repair and the tool’s overall value before deciding. For high-quality tools, a repair may be worth the investment, while cheaper tools might be better off being replaced entirely.
DIY Repair Tips and When to Call a Professional
Simple repairs, such as replacing a handle or tightening screws, can usually be done yourself. However, for more complex issues like fixing internal components or replacing critical parts, it’s best to call in a professional to ensure the repair is done properly.
Conclusion
Inspecting your hand tools regularly is the best way to ensure that they remain functional, safe, and effective. By checking for visible damage, assessing moving parts, cleaning tools after each use, and storing them correctly, you can extend the lifespan of your tools and prevent accidents. Remember that regular maintenance is key—taking a few minutes to inspect and care for your tools can save you time, money, and frustration in the long run.
FAQ’s
How often should I inspect my hand tools? Inspect your hand tools at least once every few months, but for high-use tools, consider inspecting them more frequently to catch any issues early.
What should I do if a tool has rust on it? If you notice rust on a tool, clean it immediately with a rust remover or a mixture of vinegar and baking soda, then apply a protective coating to prevent further rusting.
Can I replace a broken handle myself? Yes, most hand tool handles can be replaced by purchasing a replacement handle from the manufacturer or a tool supply store and installing it yourself.
How do I sharpen hand tools safely? Sharpen tools using a sharpening stone, file, or electric sharpener, following the manufacturer’s guidelines for the specific tool type. Always use proper techniques to avoid damaging the blade.
What are the signs that my tool needs to be replaced entirely? Signs that a tool may need to be replaced include severe rust, cracks in the metal or handle, misalignment that can’t be fixed, or significant wear that impacts the tool’s function.
How do I store my tools to prevent damage? Store tools in a dry, cool place, away from humidity, and ensure they’re organized in a way that prevents contact with other tools that might cause friction or scratches.
Why is it important to have the right balance in a tool? A well-balanced tool ensures better control, reduces strain during use, and minimizes the risk of accidents or inaccurate work.
Looking for Custom Hand Tools for Your Brand?
At KOLARWIN TOOLS, we specialize in high-quality hand tools for all your needs. Whether you’re looking for car repair tools, woodworking tools, DIY tools, or hand tools for any other application, we offer OEM (Original Equipment Manufacturer) services to help you create the perfect products for your brand.
Our team ensures that every tool we produce meets the highest standards of quality, performance, and durability. We provide a variety of customization options, from design changes to branding, so your tools align with your business goals and client expectations.
Why Choose KOLARWIN TOOLS for Your OEM Needs?
- Expert Craftsmanship: We pride ourselves on delivering tools that last and perform under the toughest conditions.
- Customization: Your brand, your design. We work with you to bring your vision to life.
- Reliability: With years of experience, we ensure timely deliveries and consistent product quality.
Ready to Get Started?
Contact us today to discuss your requirements, and let’s create the perfect OEM hand tools for your business.