Introduction
Weatherization plays a crucial role in making homes more energy-efficient, yet many people overlook the tools required for effective weatherization. Without the right hand tools, the task of improving insulation and sealing gaps can become difficult, time-consuming, and ineffective. Weatherizing your home can be simple and cost-effective when you know the right tools to use. In this article, we’ll explore four essential hand tools that every homeowner or professional should have when tackling weatherization projects. These tools are not only crucial for efficiency but will help you achieve lasting results that save you money in the long run.
What Is Weatherization?
Weatherization is the process of preparing a home or building to handle the various environmental elements more effectively. It involves improving the insulation, sealing air leaks, and taking steps to ensure that the home maintains a comfortable temperature year-round. This can be especially important in areas that experience extreme weather conditions, such as cold winters or hot summers.
The primary benefits of weatherization include reduced energy bills, a more comfortable living environment, and a longer lifespan for the building’s structure. Weatherizing your home means you are taking proactive steps to prevent energy loss, keep out drafts, and avoid unnecessary heating and cooling costs. Common weatherization tasks include sealing cracks and gaps around doors, windows, pipes, and other vulnerable areas. Adding insulation to attics, basements, and walls is also a key step.
Why Are Hand Tools Essential for Weatherization?
When it comes to weatherization, having the right hand tools can make all the difference. Hand tools are essential because they allow for precision and control, helping you target specific areas without the risk of damaging other parts of your home. Unlike power tools, hand tools offer greater accuracy and can be used in tight spaces that power tools may struggle to reach.
Additionally, hand tools are often more affordable than power tools and are a cost-effective choice for homeowners or small businesses. They also tend to be lighter and easier to transport, which can be a huge advantage if you are working in multiple areas of your home or building. For anyone looking to complete a weatherization project, hand tools are an essential investment to ensure the job gets done efficiently and correctly.
Tool #1: Caulk Gun
A caulk gun is one of the most fundamental tools used in weatherization. It’s used to apply caulk, which is essential for sealing gaps and cracks around windows, doors, and other openings. The caulk gun makes it easy to apply caulk evenly and precisely, ensuring a thorough seal that helps prevent drafts and energy loss.
There are many different types of caulk available, including silicone, latex, and acrylic, each with its specific use case. Silicone caulk, for example, is often preferred for areas exposed to the outdoors due to its weather-resistant properties. Latex caulk, on the other hand, works well in interior areas where flexibility and ease of application are more important.
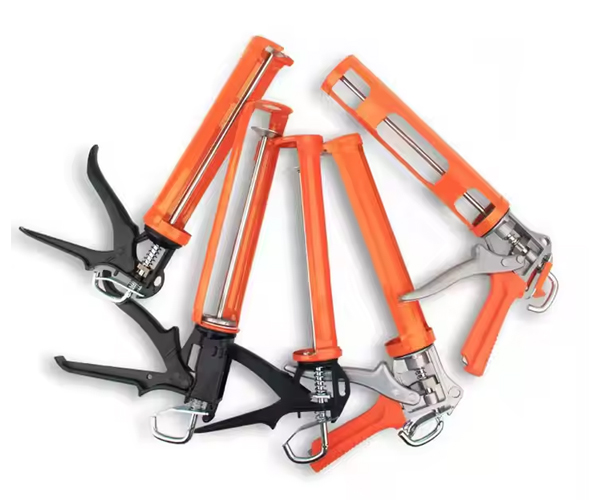
Using a caulk gun might seem simple, but it requires some practice to achieve a clean, uniform application. Start by cutting the tip of the caulk tube at a slight angle, insert the tube into the caulk gun, and slowly pull the trigger to release the caulk. Ensure that you press the caulk firmly into the crack, and use a damp cloth or your finger to smooth it out. Once the job is done, make sure to clean the nozzle and caulk gun thoroughly to prevent any build-up that could affect future applications.
Tool #2: Insulation Knife
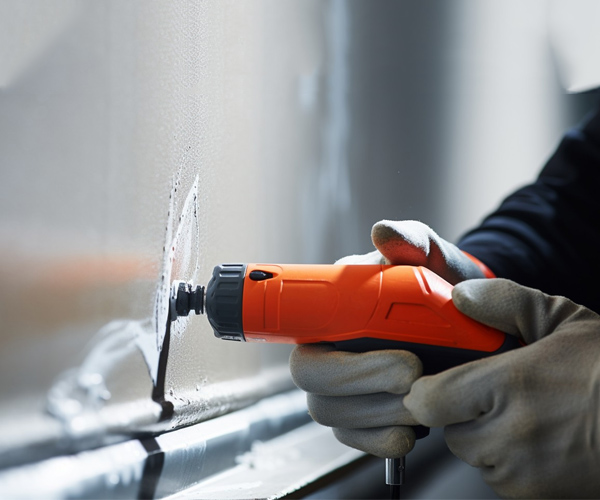
An insulation knife is a specialized tool designed for cutting through insulation materials like fiberglass or foam board. When you are weatherizing a home, cutting insulation properly is critical to ensure it fits snugly into spaces like attics and wall cavities. A standard utility knife might not be sharp enough to handle thicker insulation materials, which is where the insulation knife comes in.
This tool is designed to make clean, accurate cuts, allowing you to install insulation more effectively and efficiently. The long, serrated blade is ideal for cutting through dense insulation materials, and the handle is typically designed to provide a comfortable grip to help you work for longer periods without discomfort.
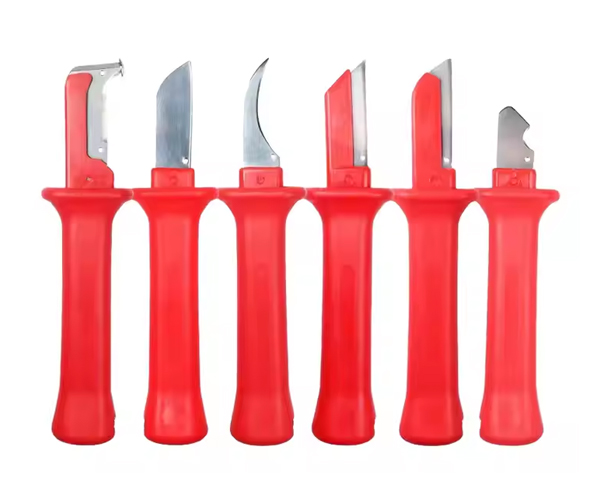
When using an insulation knife, always wear protective gear, such as gloves and goggles, as the insulation can irritate the skin and eyes. Cut insulation slowly and steadily, and take extra care when working in confined spaces to avoid injury. As with any cutting tool, it’s important to maintain the blade’s sharpness by replacing it when it becomes dull.
Tool #3: Utility Knife
A utility knife is a versatile and indispensable hand tool that comes in handy for various weatherization tasks. Utility knives are commonly used for cutting materials such as weatherstripping, vapor barriers, and other weatherization products. Whether you’re sealing windows, doors, or ductwork, a sharp utility knife ensures clean, precise cuts that provide an effective seal and minimize waste.
The beauty of a utility knife lies in its ability to handle different types of materials with ease. For example, when installing weatherstripping, a utility knife allows you to cut the material to the proper size so that it fits snugly around windows and doors, preventing air leaks. Similarly, a utility knife is perfect for cutting vapor barriers that protect insulation from moisture.
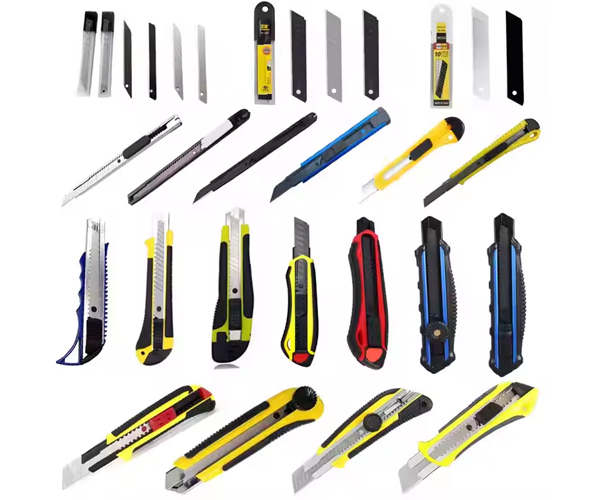
When using a utility knife, make sure to use the correct cutting technique. Always score the material first with a light cut and then apply more pressure for deeper cuts. This method helps prevent mistakes and ensures that the cuts are clean and smooth. Additionally, ensure that the blade is sharp to reduce the risk of jagged edges or tearing.
Tool #4: Weatherstripping Kit
Weatherstripping is one of the simplest and most cost-effective ways to improve a home’s energy efficiency. A weatherstripping kit is designed to seal gaps around windows, doors, and other openings to prevent drafts and air leakage. Proper weatherstripping installation can make a huge difference in keeping your home comfortable year-round.
There are different types of weatherstripping materials, including foam, rubber, and felt. Foam weatherstripping is often used for smaller gaps, while rubber weatherstripping is more effective for larger openings. Felt is a common material for door seals but is less durable than rubber or foam. Each material has its advantages and disadvantages depending on the area you’re sealing.
To install weatherstripping, start by cleaning the surfaces where you plan to apply the material. Measure and cut the weatherstripping to fit each side of the window or door frame. Apply the material in a continuous strip, making sure it is snugly pressed into place to create an airtight seal. Weatherstripping is an easy and inexpensive DIY task that yields significant benefits in terms of energy savings.
How These Four Tools Work Together
While each of these tools is important individually, they work best when used together as part of a comprehensive weatherization plan. For example, you might use a utility knife to cut weatherstripping to the right size, then apply it with a caulk gun around the edges of doors and windows. In addition, you’ll need an insulation knife to cut insulation materials to fit around the window frames and behind walls, while the caulk gun ensures that any gaps or cracks are sealed to prevent air leakage.
Using these four tools in combination can help you achieve a thorough and effective weatherization project. Each tool plays a unique role, from sealing gaps to cutting insulation, ensuring that your home becomes more energy-efficient in every aspect. The key to success is proper planning and understanding how each tool works to complete the job.
Choosing the Right Tools for Your Weatherization Project
When planning a weatherization project, it’s important to choose the right tools for the job. Factors such as material types, the size of the gaps or openings, and your budget should guide your decisions. For example, if you’re working with foam board insulation, you will need a sharp insulation knife to make clean cuts. On the other hand, if you’re focusing on sealing windows and doors, a weatherstripping kit and caulk gun should be your go-to tools.
It’s also important to choose tools that offer durability and longevity. Investing in high-quality, long-lasting tools means you won’t have to replace them as often, saving you money in the long run. Look for well-reviewed brands that are known for producing durable, reliable products.
Common Weatherization Mistakes and How to Avoid Them
Even the most experienced DIYers can make mistakes during weatherization projects. Some common errors include applying caulk unevenly, cutting insulation inaccurately, and failing to properly seal weatherstripping. These mistakes can lead to ineffective weatherization and waste time and money.
To avoid these mistakes, make sure to measure twice before cutting any materials. When applying caulk, ensure that it’s pressed firmly into the crack and that the seal is smooth. For weatherstripping, make sure the material is cut to the correct size and fits tightly to prevent air from leaking through.
The Importance of Safety While Using Weatherization Tools
Safety should always be a top priority when using any hand tool. Wear gloves, goggles, and other protective gear to avoid injury while working with sharp tools like utility knives and insulation knives. When using a caulk gun, take care not to apply too much pressure, as it can cause the caulk to spill out and make a mess. Additionally, always keep your work area clean and free of debris to prevent accidents.
Can I Do Weatherization Myself or Should I Hire a Professional?
Many homeowners can perform basic weatherization tasks on their own with the right tools. Tasks like sealing gaps around doors and windows, adding insulation, and installing weatherstripping are relatively simple to do yourself. However, if you’re dealing with more complex issues like air duct sealing or major insulation installation, it might be best to hire a professional who has the necessary experience and tools.
Hiring a professional can ensure that the job is done correctly and efficiently, especially if you’re unsure about your own DIY skills. In the long run, hiring an expert can save you time and frustration, while also guaranteeing a higher level of performance.
How Weatherization Improves Your Home’s Energy Efficiency
Weatherizing your home can significantly reduce your energy costs. By sealing gaps and adding insulation, you prevent warm air from escaping in the winter and cool air from leaking out in the summer. This results in a more comfortable living environment and lower heating and cooling bills.
Energy-efficient homes are also more sustainable, helping reduce the overall demand for energy. By improving insulation and sealing leaks, you’re not just saving money but also contributing to a more eco-friendly world. Over time, the energy savings from weatherization can add up significantly, making it a smart investment.
Weatherization Tools for Specific Locations and Climate Conditions
The tools you use for weatherization will depend on your local climate. For example, in cold climates, you’ll want to focus on insulating pipes and sealing windows and doors to prevent heat loss. In hot, humid climates, moisture resistance becomes a key factor when selecting caulk and weatherstripping materials.
The type of insulation and sealing materials you use will vary depending on whether you’re working in a warm or cold climate, and different weatherproofing products may be required for different environments. Always consider your local climate conditions when selecting your weatherization tools and materials.
The Future of Weatherization Tools
As the demand for energy-efficient homes continues to grow, weatherization tools are becoming more advanced. Emerging trends include tools designed to be more eco-friendly, such as caulk made from sustainable materials and insulation that is more efficient at keeping temperatures stable. New tool designs also make it easier to use, with improvements in ergonomics and cutting precision.
With the rise of smart technology, some weatherization tools even feature built-in sensors that help you identify leaks or areas that need attention. As more innovative solutions become available, it’s important to stay updated on the latest tools and techniques to ensure your home is as energy-efficient as possible.
Conclusion
Weatherizing your home doesn’t have to be complicated or costly. By using the right hand tools like a caulk gun, insulation knife, utility knife, and weatherstripping kit, you can take control of your home’s energy efficiency. These simple yet effective tools allow you to seal gaps, add insulation, and ensure your home is properly weatherized.
Start using these tools today, and you’ll notice a difference in comfort and energy savings. Take action now and make sure your home is properly prepared for any season. By doing it yourself or hiring a professional, you’re not only saving money but also contributing to a more sustainable future.
FAQ Section
- What are the most common mistakes people make when weatherizing their home?
- The most common mistakes include overapplying caulk, not cutting insulation properly, and failing to seal weatherstripping effectively.
- How can I choose the right caulk for my weatherization project?
- The type of caulk you need depends on where you’re applying it. For outdoor areas, silicone caulk is often the best choice, while latex or acrylic works well indoors.
- Is weatherization only useful in cold climates?
- No, weatherization is important in all climates. It helps keep homes cooler in summer and warmer in winter by preventing energy loss.
- What is the best way to seal windows and doors without professional help?
- Use weatherstripping for gaps around doors and windows, and apply caulk to seal cracks. Make sure the materials are installed correctly to achieve the best seal.
- Can I use these tools for other home improvement tasks?
- Yes, many of these tools, such as the utility knife and caulk gun, can be used for a variety of other home projects, including general repairs and installations.

